
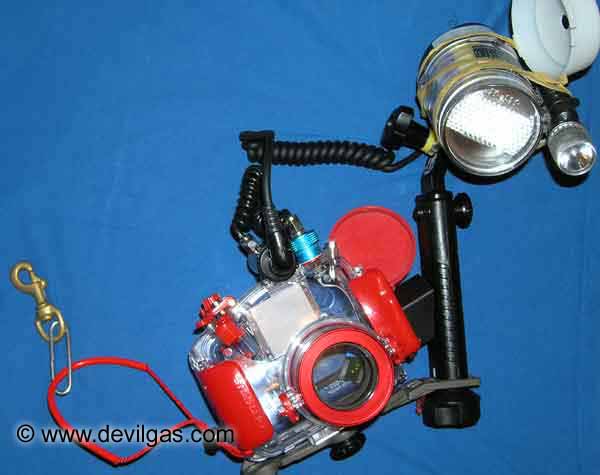
PT-020 Housed Olympus 5060 with YS60TTL/s
Having been successful in an Olympus sponsored photography competition a number
of years ago, the £500 prize voucher was put to good use in the purchase
of an Olympus 5060 wide zoom camera and a PT020 housing, thus finally releasing
me from the expense of using film underwater.
The Camera and Housing
This particular camera was chosen because it took Compact Flash memory (which
my other camera uses), has a 28mm wide angle lens, allows for macro focus
to 3cm and for it's ability to mate the camera to my Sea and Sea YS60TTL/s
flash (Sea and Sea connector). The housing itself looks remarkably robust,
with a double 'O' ring sealing the back cover, and allows full operation of
all camera controls whilst underwater. Additionally, it has a 5 pin port allowing
the connection of external strobe units to the camera. The ability to reuse
as much of the Motormarine IIex setup I had was important, although I'm still
left with a couple of lenses that are now redundant. I may have to construct
something that will allow the 20mm wide angle to be used.
Re-Using the YS60 Strobe
Please bear in mind, this page was initially written 4 years ago when there
were few options for connecting any 'old' strobes to underwater cameras. Since
then, there have been various options made available,..
1 - Use a digital adaptor which relies on the internal flash firing to trigger
the external flash
2 - Use an infrared adaptor to couple the camera to the flash
3 - Use the Michael Finger TTL adaptor (the only TTL solution available when
this page was created)
4 - Use the Matthias Heinrich replacement bulkhead and TTL adaptor (if I were
to embark on this again, then this is the option I'd go for)
Of the 4 options, option 2 was superseeded by 3 which is pretty much superseeded
by option 4.
Option 1 is viable but as it uses the cameras internal flash, can cause problems
when, for whatever reason, the cameras flash will not fire e.g. the 5060 in
super macro mode will disable the flash.
I have a number of digital adapators and all do a great job with whatever
camera they've been used with, as long as the internal camera flash will fire.
As you're reading this page, then you're likely using a 5060.
I can't comment on option 4 as I've not used nor seen this bit of kit (see
the broken bulkhead page) but it would appear
to be the best bet as it not only provides connectivity to the 5060, alleviates
the need for a battery in the adaptor, but also replaces the flawed Olympus
bulkhead.
The 2002 Solution
After getting the camera, I contacted Matthias
Heinrich with a view to using his Infra Red TTL interface for the 5060
and the YS60. Being the top bloke that he is, he suggested a better suited
product and put me in touch with Michael Finger (www.mike-dive.de)
who produces a hardwired solution using the existing PT020 bulkhead connector.
Update - Matthias now produces both a digital
slave adaptor which supercedes the infra red solution he'd previously
produced, and also a series of replacement
bulkhead connectors for Olympus housings. The rest of this article will
refer to the solution I'd purchased from mike-dive.
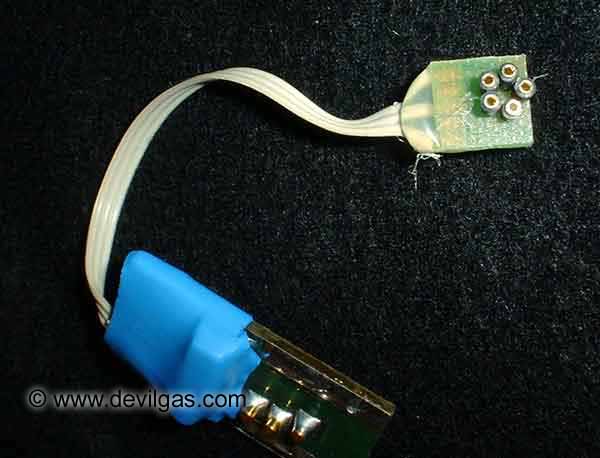
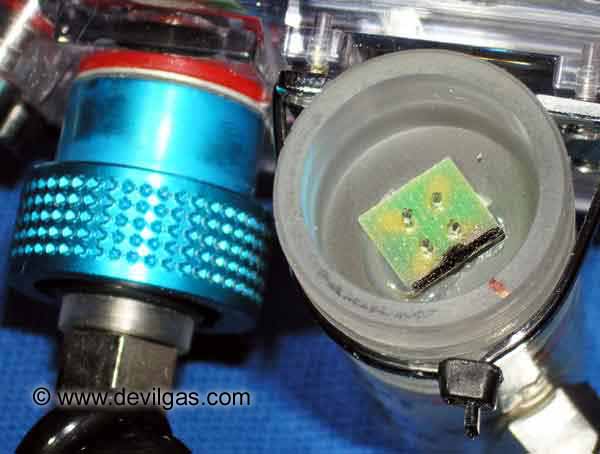
The Internal Connector (updated)
A small PCB is connected to the camera hotshoe which has lead outs to the
internal side of the 5 pin bulkhead connector that exists on the PT020 housing.
Care needs to be exercised in getting the sockets lining up correctly, with
careful expanding of the 5 sockets to get a good alignment. However, once
it's connected, there is no need to ever remove it. This bit of electronics
is powered by a CR2025 watch battery. My example seems to get through batteries
at a fair rate so it's worth getting a few spares.
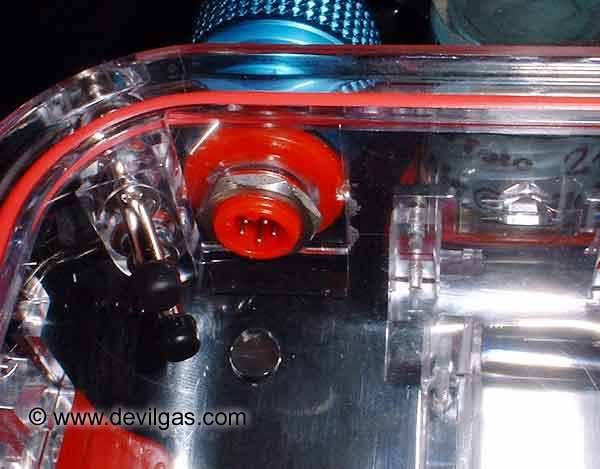
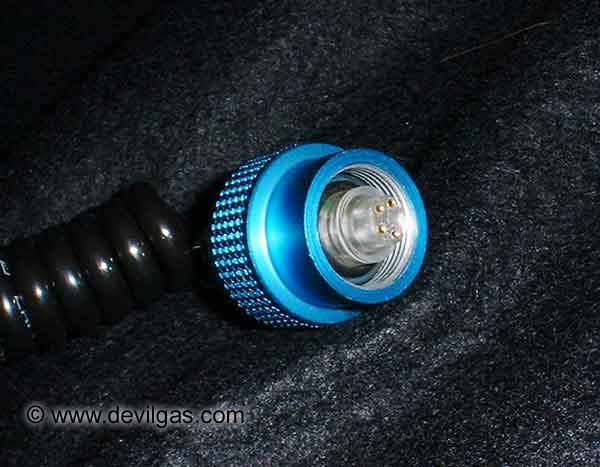
The External Connector (updated)
The other part of the solution consists of a waterproof connector that screws
onto the outside of the bulkhead and connects to the YS60 using a curly cord
and moulded strobe connector block. Extreme care needs to be taken when initially
offering up the connector to the bulkhead pins. Make sure the 'O' ring on
the connector shank is removed for this so you can feel when things are going
right / wrong. This is all mentioned in the instructions from Mike, but bears
repeating.
There are 2 polarising lugs which mean you can't go wrong, but the pins in
the bulkhead do require careful alignment (read slight bending with a jewelers
screwdriver) so that the MikeDive connector fits nicely. I did manage to bend
one pin over in my initial attempts. This, luckily, bent back straight again
without damage.
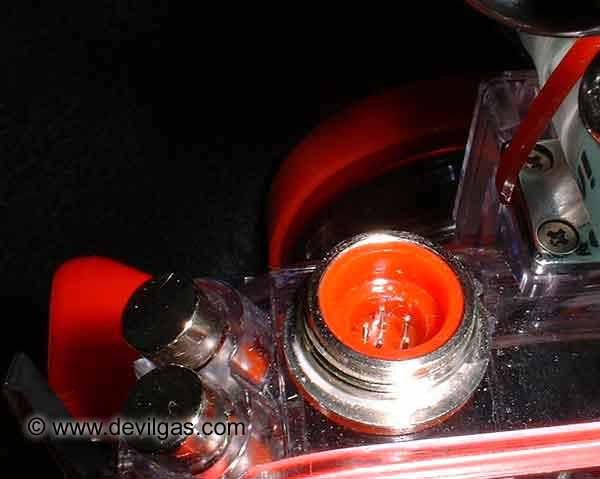
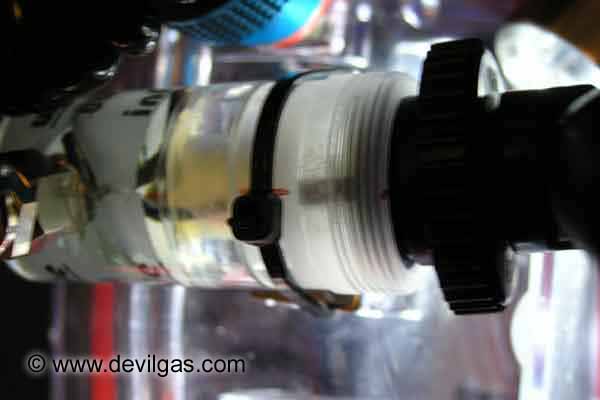
When the pins are all lined up, it's worth removing and replacing the connector
a few times just to get everything lining up easily. Now that's been done,
replace the 'O' ring on the shank and try again. There is a second 'O' ring
at the top of the shank (visible just inside the anodised aluminium nut) which
should NOT be relied upon for keeping the connector waterproof (the voice
of experience?). In theory, you should never need to remove this connector
again other than to check for water leakage. It may be prudent to use some
silicon grease on the bulkhead thread as corrosion will result with the metal
to metal mechanical connection.
To get around the problem of electrolytic interaction between the bulkhead
thread and the mikedive connector thread, i decided to add an o-ring to the
base of the bulkhead connector. If you do this, do not tighten the mikedive
waterproof connector any tighter than finger tight. Why? Tightening more than
this will result in the red plastic connector shearing. I know, mine succumbed
to this very problem. I should point out that this is NOT a fault with Mike's
connector. The Olympus design leaves a little to be desired. If they ever
did an evolution of the PT-020 I'd hope this is the one thing that would get
replaced.
Update - Matthias Heinrich produces replacement
bulkheads for this housing (and many others), together with the electronics
that are required to interface your external strobe with the 5060
I have had one problem with one of the socket inserts pulling free from the
connector, however this hasn't affected operation and does make alignment
a whole lot easier. Additionally, Mike accidentally supplied a Nikonos connector,
but this was rectified in literally 2 days. Big thumbs up for Mike for both
his pre and aftersales service.
Unfortunately, Olympus have 2 different external bulkhead threads on the 020.
These are identified by counting some painted spots (sic) on the bulkhead.
Mine was a 4 spot - the type Mike did not yet have the tooling for. Fortunately
for me, a few weeks after my initial inquiry, Mike was set up for this particular
thread and I was amongst the first to have the 4 spot connector!
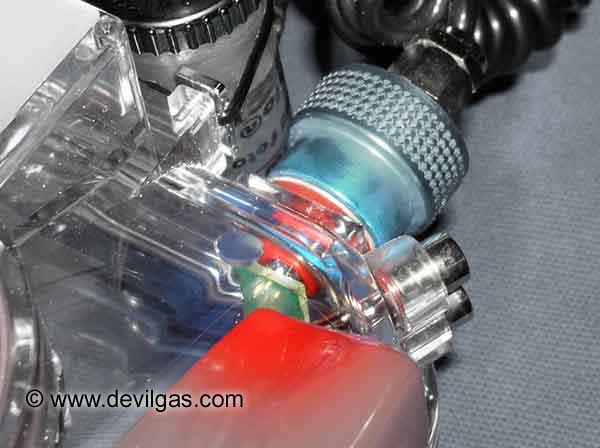
The Strobe Connector
The other end of the curly lead terminates in an epoxy molded connector block
sporting a small PCB with 4 pins. These 4 pins are polarised by a small black
dot which is to line up with the lug on the strobe lead. When connecting it
together, care needs to be exercised as it is easy to bend the pins by inadvertently
twisting the strobe lead during tightening. So, when tightening the connectors
together, only turn the locking collar on the strobe connector whilst holding
the strobe socket and MikeDive plug absolutely still. I drew alignment marks
on the outside of the plug which align with both the 90deg angle in the strobe
lead and the polarising lug, making it significantly easier to align the pins
in future.
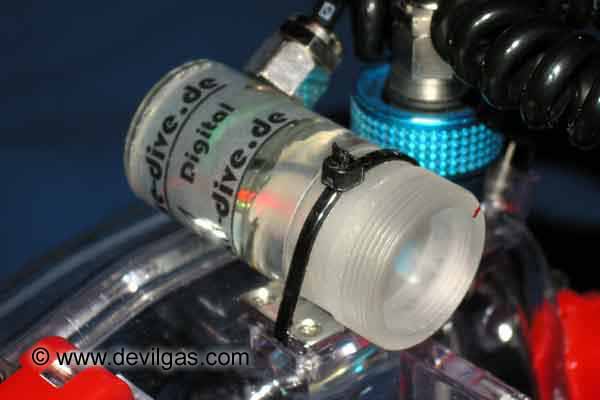
Mounting it to the Camera
I mounted the molded plug to the accessory shoe mount on the camera. This
was achieved by loosening the 4 securing screws (they don't penetrate the
housing so there's no risk of it flooding), passing a zip lock under the plate,
tightening the screws again then tightening the zip lock around the plug.
If you don't want to take the strobe on a dive, it is a simple case of removing
the strobe connector and replacing it with a blanking plate from a Motormarine,
assuming you have one.
![]()
If you have the 5060 and PT020, then the MikeDive strobe connection solution
is perfect and highly recommended. I paid 184 Euros (inc paypal charges and
p&p) for the connectors and electronics. To me, it was worth every penny
as it allowed me to use the expensive strobe that would otherwise be collecting
dust.
Update - the replacment
bulkhead solution from Matthias Heinrich is similarly priced and would
appear to be the one to go for.
This may seem like a lot of hassle, but the beauty of it is that it doesn't
rely on a through-case IR beam but uses hard wiring. Consequently, there are
no issues with alignment of sensors inside and outside the case and it also
alleviates the need for the internal flash to fire so Super Macro mode can
be used with the strobe actually firing.
General Camera Comments
The whole thing is a dream to use, although the camera does have a habit of
deciding that the flash doesn't need to fire despite it being told to do so.
Autofocus (updated) - works particularly well underwater and
is certainly more accurate than manual focussing. Speed can be an issue (what
camera other than dSLR's doesn't have this problem?) but in good lighting
it is relatively quick. The camera can be helped along by pointing it at a
'contrasty' object or by using a spotting light. Red light would probably
work better so as to not fool the metering system. In more challenging conditions,
the 5060 can hunt for a number of seconds while trying to grab a focus lock
then eventually give up the ghost. This can be frustrating and indicates a
lack of sensitivity in the focus system. When compared to something like the
Fuji F30, then the Oly is a fair distance behind in terms of both speed and
success rate.
There are 3 focus ranges on the 5060 :-
Normal - 80cm --> infinity
Macro - 20cm --> 80cm
Super macro - 3cm -->20cm (internal flash disabled in super macro)
All can be over-ridden manually, but the manual focus technique is a bit fiddly
to say the least and usually best avoided. If you intend to take a few shots
of the same subject from the same vantage point, consider doing an auto focus
to get the initial focus lock then flip the camera into manual focus. Your
speed between shots will be greatly improved.
Metering (updated) - not sure on the P,A or S mode performance
as I only ever run the camera in manual (M) mode. Have since used S &
A modes and the metering is spot on with the exposure, when within operational
bounds (shutter speeds / apertures available), being exactly as required.
Manual mode is where it's at though as you have full control over the exposure.
e.g. to get those nice deep blue backgrounds, initially meter for the background,
noting the settings. Dial these settings in manually, then purposely underexpose
by 1 - 1.5 stops. Set your flash to over expose (FEC) by 1 stop and fire away,
adjusting the FEC accordingly.
Shutter response (updated) - is adequate with a slight delay
(after focus is complete) between the button being pressed and the shot taken
(after the pre-flash). This can make things a little hit and miss when trying
to get the clownfish shots, but being digital the usual film bounds are removed
and it's something you soon get used to. The major delay is in the camera
getting an autofocus lock which can take anything between 0.5 and about 4
or 5 seconds.
Storage (updated) - the camera can take 2 types of storage.
Compact Flash and xD cards. I will have both types in the camera.... 1Gb CF
and 128Mb XD but swap to the XD only when and if the CF gets filled. This
does mean you shouldn't miss that manta when 'the film runs out'. Am now using
8Gb CF and 2Gb xD
Power - battery performance is really good, with the camera
easily doing 3 dives of 45 min usage before needing a recharge. It is worthwhile
investing in a 2nd battery though as the supplied charger isn't particularly
fast, taking around 4 hours.
Stills (new) - the 5060 uses a 5Mp sensor, which at lower ISO
values produces very good results. From ISO 400 upwards, noise is evident.
Colour rendition, sharpness, contrast etc are all very good with sharp, punchy
images, being easily attainable. On a back to back test with the 5060 and
my newer Fuji F30, the images produced by the Oly were superior, but the F30
outperforms the Oly in speed, focus accuracy and focus hit rate.
The 5060 allows you to shoot in JPG (with various compression rates), TIFF
and RAW. Shooting in RAW is great for getting extra detail from the sensor
but takes a frustrating 12 seconds or so to write to the card. In this 12
secs, you cannot do anything else with the camera! This is fine if you're
shooting a static subject, but for something that is moving and you need to
get lots of shots (sharks, clowns etc) then it's a limitation.
Output resolutions are selectable between various settings with the maximum
size being 2592x1944. Comparing this to todays (2008) offerings it seems low,
however I have managed to print one image at a massive 40" x 30".
Sure, it doesn't stand up to close examination, but you don't look at an image
of that size from 2' away. For normal (up to A4) size prints, then the 5060
is perfectly acceptable.
Video (updated) - the camera will shoot quicktime MOV files
at 15fps with or without sound. If sound is enabled, you cannot change the
focus or zoom position. I guess this is to do with the autofocus and zoom
noise. If sound is off, both autofocus and zoom are operative. The 15fps is
limiting, making playback jerky. If you intend to shoot a lot of video, then
you should consider an alternative - I use the F30 as a basic video capture
device. So, the video capabilities of the F30 are better than nothing, but
not as good as you require.
White balance - if you have a clean, white dive slate with you,
it is possible to set the white balance on the fly. This is especially useful
when shooting video, although I didn't bother on the Red Sea trip. It should
alleviate the necessity for using colour correction filters. You can also
fine tune whatever white balance setting is currently in use. So, if you used
the slate at 10m and go shallower, you can cool the white balance. If you
go deeper, you can warm it. Certainly saves having to redo the white balance
at different depths.
Camera features - these can be pretty annoying as selecting
one thing in the menu will disable another feature entirely. E.g. setting
continuous shooting mode will automatically turn off the flash and not allow
you to select another flash setting until the drive mode is changed. M (manual)
mode will only let you set the flash to OFF or Slow Sync (assuming you've
not set another mode that disables flash completely). P (camera decides shutter
and aperture) mode will give you full control over the flash, but little control
over exposure. IIRC, A (aperture priority) mode also gives you full flash
control and S (shutter priority) mode gives the same limitations as the full
manual M mode. There's sense there somewhere, but where, I'm not too sure.
Subjectively, this may be a bigger issue to me as I'm used to DSLR's where
the camera does what it's told and doesn't second guess you, so, it's pretty
much a case of playing with the thing extensively before getting in the water.
On the plus side, there are 8 My-Modes which can be pre configured to certain
parameters. These make it a lot easier and faster to swap between popular
settings underwater. E.g. full wide angle, super macro etc etc.
| v1.03 | 10th Sep 2008 | General update |
| v1.02 | 14th Sep 2004 | Few typos fixed, electrolysis notes relocated and an update to camera features made |
| v1.01 | 5th Aug 2004 | Electrolysis notes added |
| v1 | 23rd Jul 2004 | |
|
|
||